


On the last day of August I received an email from Foodbuzz letting me know that I had an opportunity to become a Nature's Pride Bread Ambassador at the 2010 Foodbuzz Blogger Festival. All I needed to do was come up with an original recipe that uses Nature's Pride bread. I actually love Nature's Pride bread so I was so excited to do this. In addition to being able to get travel and lodging if I am selected to become a Nature's Pride Bread Ambassador I also got a coupon for a free product from Nature's Pride. I am receiving no other compensation for this post. I will let you know if I win though! I'd be super excited to be able to attend the Foodbuzz Festival!
Once I heard about this opportunity I started coming up with ideas about what I could make. Baked French Toast was on the list - the recipe I made won the weekly poll - find it here. Another idea was stuffing, I love stuffing but there are SO many recipes out there already... but that led me to an idea of making a dessert stuffing. I tried one version and didn't like it so much... I still have one more idea that I want to try in that area. You'll know it works if I post the recipe in a week! The third idea I had was an apple pie with bread instead of pie crust. So you have to understand that I am not a huge fan of pie crust, which is odd since my mom makes a really good pie crust (she was the official pie maker for Thanksgiving at our extended family dinners). I also got inspiration from my mother in law when we were camping with Hubby's family and she put pie filling in bread and heated it over the fire (in a cast iron cooking square pan.) I've made this recipe 3 or 4 times in the past 3 weeks and absolutely love it.

Individual Apple Pies

First, you'll need some bread. I like the Healthy Multi-Grain, but the Oat-Nut bread also works well. I am sure any of their bread will work, but those two are my favorites!

You'll need one slice per person (unless you choose to use more - but we'll talk about that later.)

There are a few different ways you can do this, I'll be showing two. The first requires you removing a circle out of the bread.

This is the indent from the mason jar lid. Use whatever works for you ;)

Flip the piece of bread over - you can see some of the indent.

Finish cutting through the bread on this side.

Now you have a piece of bread with a hole in it and a round piece removed. This reminds me of Eggs in a Hole - but that's not what we're making today. However you can use the bread to make those - we're using the circle part.

Grease however many ramekins you'll be using. If you don't have any individual baking dishes don't worry we'll be discussing a different method in a minute!

See how great the bread circle fits inside? You don't want to put it in there yet, we're not finished with it - I just wanted to illustrate how great it fits!

If you're not using the bread for Eggs in a Hole, you can use part of the bread for lining the sides of the ramekin (this is not necessary, I like them either way!)

Just cut the crusts away from the remaining bread.

And you're left with a rectangle of bread.

You can either use it as is or cut it into half - lengthwise. If you do this you'll need an extra piece or two of bread to complete the lining in the ramekin.

Prepare a cinnamon and sugar mixture - I used 4 parts sugar to 1 part cinnamon. Specifically I used 1/2 cup sugar and 2 Tbsp cinnamon. I had left over mixture though... however you can use it to sprinkle on toast the next morning.

Butter each side of each round of bread. (I used a spray margarine.)

Do the same with these pieces of bread if using as well.

Coat the bread in cinnamon and sugar.

Sorry for the blurry photos of this part of the process.

My mouth is starting to water at this point... in fact you may want to have that piece of toast sprinkled with cinnamon and sugar at this point in making these!

Place round in bottom of ramekin. Sprinkle with a pinch to 1/8 tsp of cinnamon and sugar mixture.

If using the other pieces of bread, line sides with them like shown here. Like I said it is not necessary, but does taste good - it just depends on personal preference. These are ready for filling now. If you are using ramekins and want to skip the next part - skip to where it says: FILLING.

But before we fill them, I'm going to show you how you can make these without a ramekin - I understand that everybody doesn't have them!

Stretch the bread to make it close to a rectangle. Be gentle or it will tear.

Remove crusts from bread.

See that piece of bread on top, that's what we are working towards!

Using your finger (or a spoon, etc) create an indentation in the bread - be sure to leave an elevated edge.

It doesn't take too long - about a minute per piece.

Continue around the whole piece of bread.

This makes a very thin crust in the middle, but it is perfect!

Be sure to press down in the middle as well.

Spray or spread with butter or margarine on each side.

Dip and coat each side in the cinnamon and sugar mixture. Once they are coated, place on cookie sheet. They are also ready for filling.

See all these bread crusts? I plan on using them to make my dessert stuffing idea. You can use them for stuffing, croutons, french toast bites, or anything you please.
FILLING

You'll need 2 apples. I used a Granny Smith and a Fuji apple. Always use one Granny Smith apple and the other a sweeter variety. It makes a difference, I promise!

Cut apple into fourths and core it.

Then peel the apple fourths.

Next, slice the apple. I use my box cheese grater's slicer to slice the apple.

It is quick and easy, plus makes uniform thin slices.

Continue until all apple is sliced.

This is roughly what it looked like (the kitchen was low light so the color is a bit off...)

Place apple slices in a bowl.

Add 1 Tbsp lemon juice.

The lemon juice also makes it taste wonderful...

Finally add 2 Tbsp of the cinnamon and sugar mixture.

I used the same mixture I dipped the bread into.

Using your hand (or other preferred tool),

Toss apple slices until completely coated in cinnamon, sugar and lemon juice.

You're now ready to put the filling into the 'crusts'.

Place about 1/4 to 1/3 cup filling in each ramekin/bread square.

Sprinkle 1/2 to 1 tsp of cinnamon & sugar mixture over apples.

You can bake them now or add the crumb topping.
Crumb Topping (optional):

First you'll need 1/3 cup brown sugar and 1/3 cup flour.

Also 2 Tbsp butter, cut into small cubes (I used 3 Tbsp butter with 1/2 cup of each above and had leftover topping.)

Combine the flour and sugar, then add the butter.

Using a pastry blender, combine these three ingredients.

You can also use 2 forks for the same effect.

Mix until it gets crumbly.

I tend to use my hands for the last minute or so of mixing.

Top the apple filling with the crumb topping.

Bake in a 350 degree oven for 20-25 minutes.

These are delicious by themselves.

With the crumb topping and extra bread up the sides.

With the bread on bottom only.
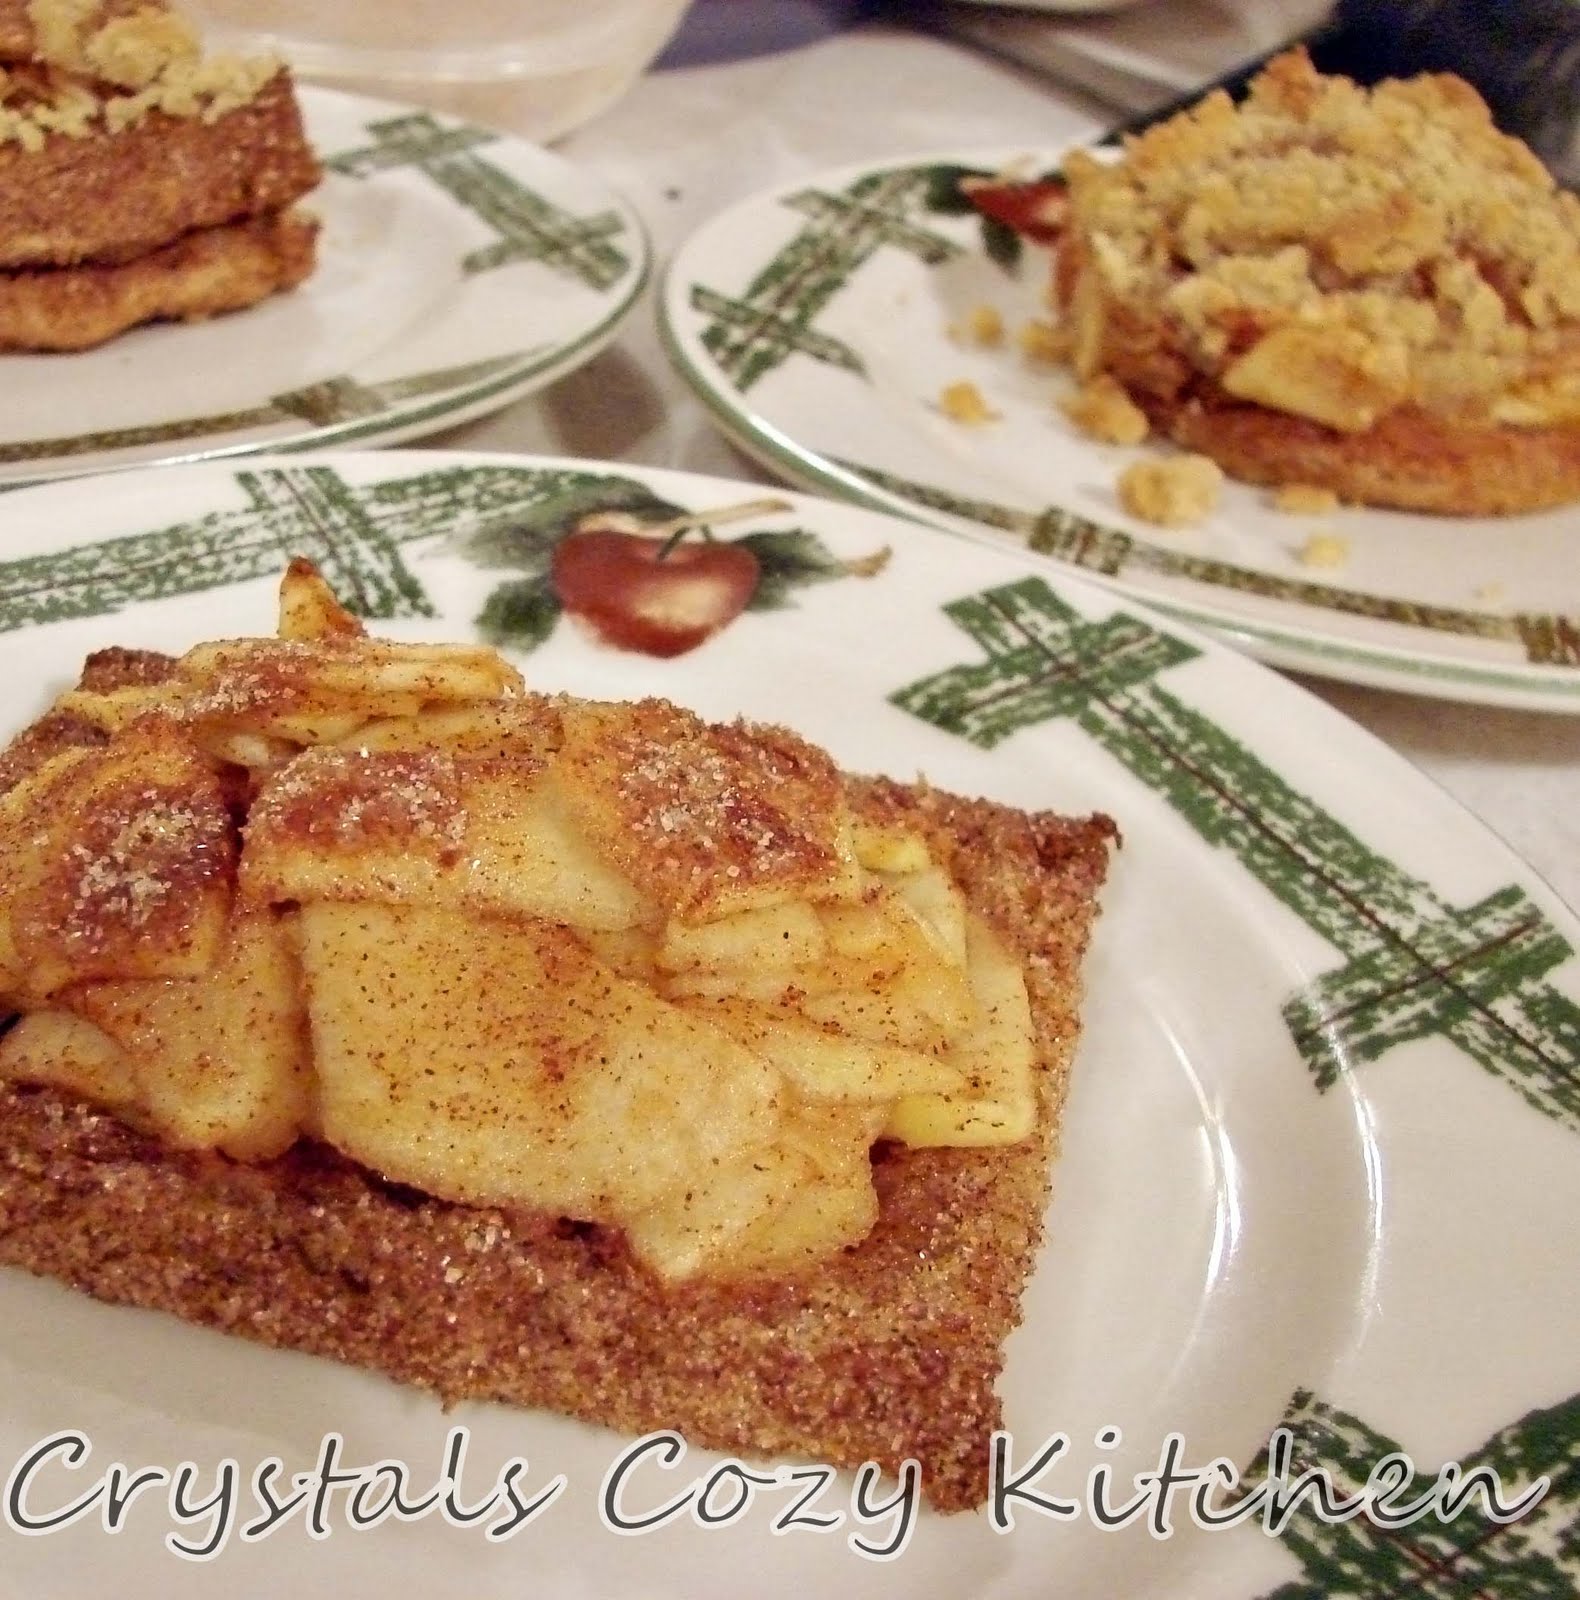
Absolutely delicious!
Better with whipped cream.

Even better with Vanilla Ice Cream.
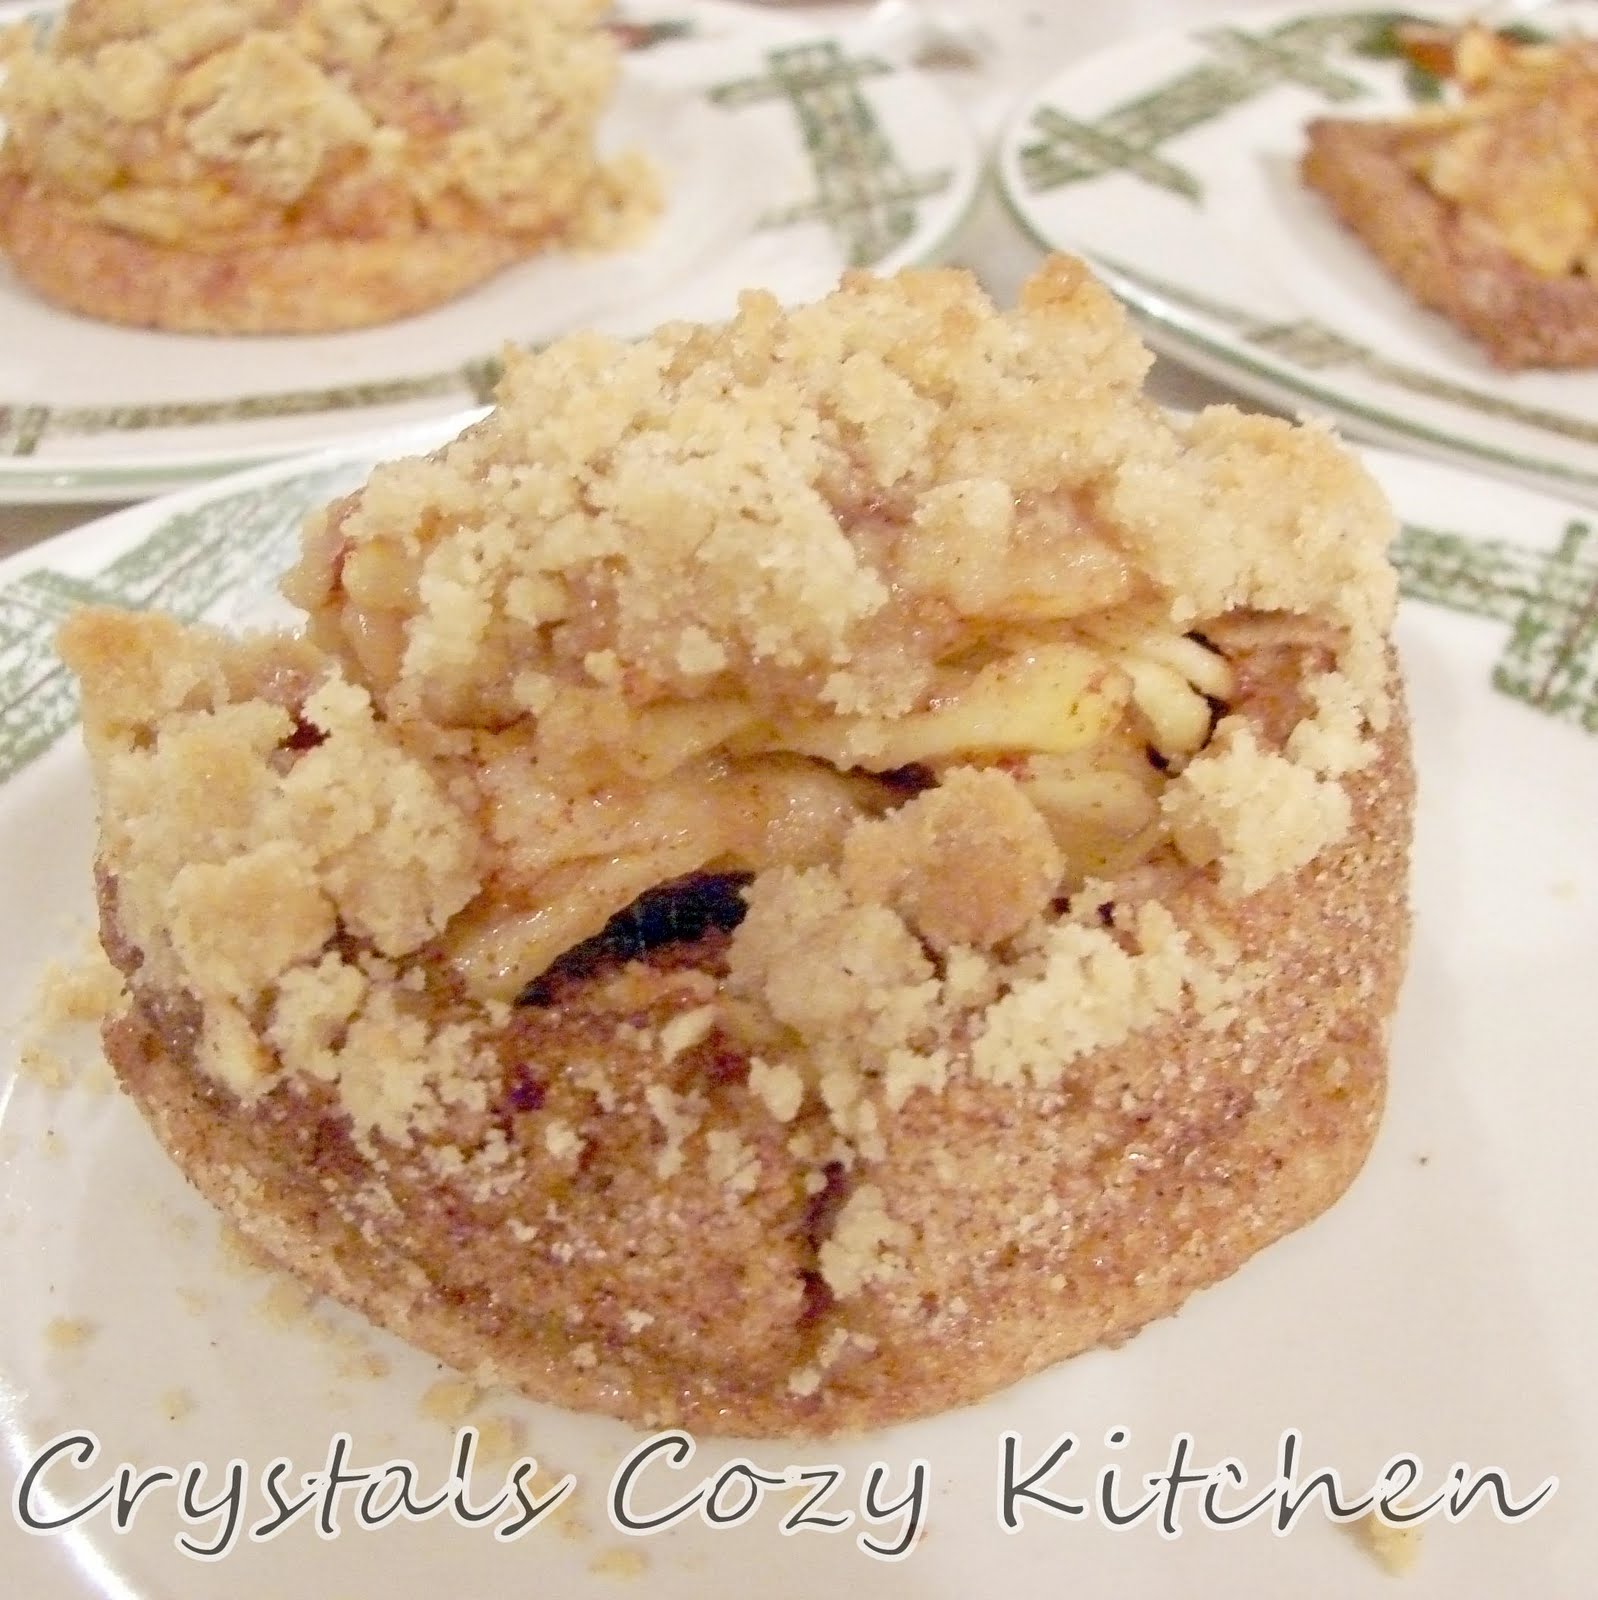
Which ever way you decided to make these, I am sure you'll enjoy them!

Enjoy!


Interesting idea! Good luck in PFB, you have my vote coming your way.
ReplyDeleteI made these with the crumb topping, absolutely delish! Thanks for the recipe..check my post-
ReplyDeletehttp://ambrotos.blogspot.in/2012/08/apple-pie-with-bread-bread-crust-and.html
Now that is creative! WOW! Great tutorial too! Thanks so much for entering this last week in the Iron Chef Mom link-up/contest for Apples on Cheerios and Lattes! We look forward to your chocolate recipes this week! :)
ReplyDeleteMackenzie from the Iron Chef Mom Team :)
Could this be made in a microwave? If yes plz tell me thr cooking time and at what temperature should I preheat the microwave.
ReplyDeleteThank you in advance
I would not cook it in the microwave, it would not get the crispy crust it needs, it would be too soggy.
Delete