Exactly one week ago Hubby and I (and our cute little boy) went on about a 2 hour drive to get to 9 Mile Canyon. This canyon has historical significance - it has petroglyphs and other remains of the Fremont Indians. This was another reenactment of a date that my husband and I went on while we were dating. I had asked him to go on a picnic with me on June 18, 2005. There were a few differences - 5 years ago I made a Brazilian themed meal, this time we had Kabobs. 5 years ago we ate first and then looked at the petroglyphs, this time we looked first and then ate. Turned out to be a bad idea because by the time we got to the picnic area it was almost dark! The major difference - 5 years ago we did not have a 15 month old son! I don't think he was too excited about all the driving and getting in and out of the car. (To see all of these pictures and a few more:
click here.)
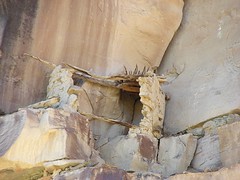
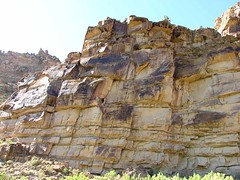
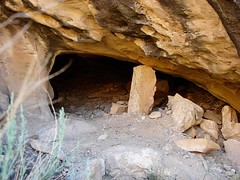
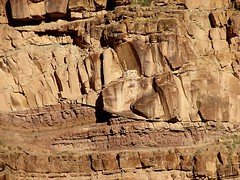
The first stop we made was to find a grainery. It is located in the photo above - can you find it. The photo below is what it looks like. This grainery has some issues - the front is missing, but we're actually grateful that it is so we can see inside!
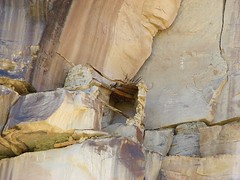
Here is another view of it:
This view shows the wood top that the grainery has. I find it really fascinating - what I find more fascinating... How did they get to these? For those of you who couldn't find the grainery in the first picture I have it circled below:
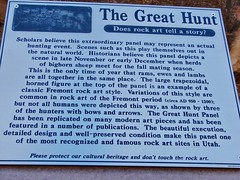
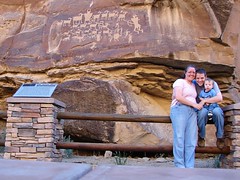
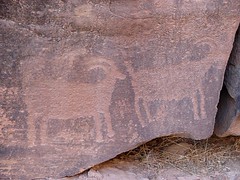
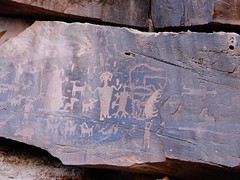
The next stop we made was at a very popular petroglyph panel called the Great Hunt. This one has been featured in National Geographic.
and the description:
And the needed family photo taken with the timer function on the camera so we can look at them later and laugh at how silly we looked...
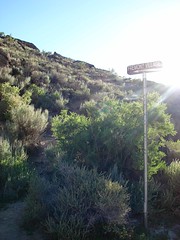
Moving on, we stopped at a trail head:
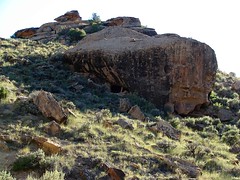
This is a sign pointing to trail for Fremont Village - the trail goes to the right - there are a few other trails that lead in different directions, but they are not the real and die off about half way up the hill... I only know this because we seemed to take all the wrong trails first. By the time we found the right trail I was exhausted and only made it to this rock:
Which had been dug out underneath and was probably a storage area.
It was quite a hike to get to this point even without having made a few wrong turns... I decided for my health (I felt I was getting heat exhaustion) that I needed to get back to my water supply. Yeah, I know silly me for not bringing it on the trail, but I honestly did not think it would be as long as it was!
Here is another grainery that we found along the road. This one has the front intact so you can see what they looked like.
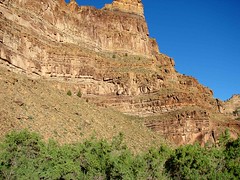
The grainery is found in this picture... this is what we had to go through to find it - and I will not have a photo with it circled this time. Good Luck. All I can say is those two trees at the cliff base - go from about their location to the right.
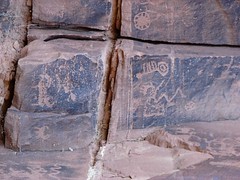
Now here are a few more of the petroglyphs we saw:
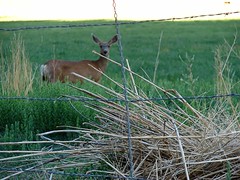
Traveling along the road we also saw:
this deer and I saw
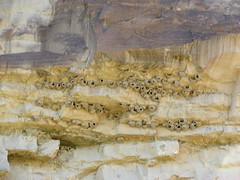
a bird that we did not get a picture of, unfortunately. We also saw cliff swallows and their nests. We had them really close to my house so I forget how awesome they are for others to see - like my husband.
It was a LONG trip and I did get a killer headache - which confirmed that I was probably going to get heat exhaustion if I would have continued on past the rock with the holes in it. It was a fun excursion. Maybe in 5 years I'll forget how long we drove on unpaved roads and be temped to try it again... Maybe not.
For those of you who want a little history lesson:
Nine Mile canyon is actually 40 miles long... there are several stories about how it got the name. One is that a creek named Nine Mile Creek by mapmaker Bishop who went on an expedition with John Wesley Powell in 1869.
There are actually two types of rock art: pictographs and petroglyphs. Pictographs are painted on rocks using colors naturally found in minerals. Petroglyphs are cut into the rock. The rock art in Nine-Mile Canyon depicts both humans and animals. The Fremont had their own art style. Their human figures are horned, trapezoidal-shaped bodies. Often they have elaborations such as necklaces, earrings, shields, swords, loincloths, and headdresses. They also develo9ped a stylized way of making animals. Other designs may have been purely decorative or they may represent calendars or maps.
The Fremont:
They occupied the canyon as early as 300-500 A.D. They were a primitive people and did not shape rocks for tools or for building as the Anasazi or the Pueblo Indians did. Also the Fremont used weapons and shields that are not found in the Anasazi culture indicating that the Fremont may have migrated from a different area of the country.
The Fremont built their living quarters above the flood plain of the river. They were part Farmer and part hunter. They raised corn, beans, and squash. Some of their crops they dried and stored in granaries built in the rocks. They hunted all types of game from deer and mountain sheep to rabbits and rodents. Petroglyphs of such animals can be seen often in Nine-Mile Canyon. They supplemented their diet with seeds, nuts and roots.
They had permanent dwelling in semi-subterranean pit houses. The houses were built of wood and mud and were entered through an opening in the roof. Some of the structures still standing were dry laid (build without mortar.)
They wore very little clothing in the summer and relied on robes and blankets in the colder weather. They had distinctive moccasins made of hide and dew-claw hobnails. The hobnails were on the heels of the moccasins to keep them from sliding. (having hiked up to the area of a village I can understand the need for this - especially in the winter!) They made a simple smooth pottery with little decoration. Baskets were far more common.
Info taken from 9 Mile Canyon - A Guide. Utah's Castle Country