Friday, October 29, 2010

Foodless Friday: Halloween

Sometimes I feel like a Halloween scrooge! I honestly do not get into this holiday, at all. I hate the dressing up, the gory food and the disgusting movies. I think I got it from my mother. What are your feelings about Halloween? This year we did let my son get dressed up for a congregational activity tonight and we decorated cookies, but I think for the rest of the weekend I am going to be a scrooge again.
 Look at my cute little frosting snitcher!
 Here's my cute little cowboy (we didn't get the boots though...)
All of our photos of this outfit are blurry - he wouldn't stand still, and he wouldn't keep the hat on! 

Happy Halloween!

Thursday, October 28, 2010

Stuffed Bread

Three months later I'm finally posting this recipe. Sometimes I feel like such a flaky person! Let's just say the beginning of August was a crazy time for us as a family and so some things got left out and others (like this post) completely forgotten! I don't think too many of you were waiting for this post or I'd have gotten at least one email reminding me to post it! Seriously if there is something that I promise to post and forget - don't hesitate to email me because I most likely forgot about it. It's part of that I'm human thing...

When we were first married I did this as a bread braid. I like it that way, but it also works great as I'm going to show below. I have two different ways to make it shown below. First I'm showing the family size version and then the individual version. So here it is:
Stuffed Bread

First you'll need bread dough. Once it has risen, roll it out into a rectangle.
Place fillings onto the bread (leaving an inch or two around the edges to seal.)
This time I made a beef one and a turkey one... then I topped it with shredded cheese... I'll be showing a different way later. I have also stuffed these with steamed broccoli (well drained) and sprinkled the broccoli with cheese - it's pretty good. When I braided these - I would make one 'strand' of vegetables, one of cheese, and one of meat. It worked great.
Fold over each side.
Pinch ends together (it helps if you rub the ends with a little water.)
Fold ends up.
Be sure to seal them off.
Place seam side down on a cookie sheet.
As you can see I labeled these with a B and a T for Beef and Turkey.
The labels double as vents. You'll need to place at least 3 in these.
It helps them not bubble on the inside. Bake at 350 for 20 minutes or until bread is golden brown.
Here's another way to do it - individual pockets. (I used french bread dough for these - turned out great!)
Once dough is cut out, place cheese and meat on top.
Cover with another piece of cut out dough.
Label - (H) for Ham. Can you tell I have a toddler - I'm really good at labeling what words start with! ;)
These above are club pockets - ham, turkey and beef.
They started out with provolone cheese and were topped with one slice of each type of lunchmeat.
Then I put another slice of cheese on it.
Top with a bread dough circle.
Pinch ends together.
Place on a cookie sheet.
Also bake at 350 for 20-25 minutes. I put an egg wash on this dough (like typical french bread loafs.)
C = Crystal.
Doesn't this look delicious?
Good thing I just ate or I'd be hungry!
Enjoy!

Wednesday, October 27, 2010

Kitchen Tip: Honey

Today's tip is really late, I know... it's been one of those days. It is also a little odd... but not too odd. Growing up whenever one of us got a cut that was starting to be infected we'd mix together a little honey and flour (just enough flour to make it a paste) and put the mixture on our wound (then cover with a bandaid.) It seriously works great at drawing out the infection and is something that was passed down from my great grandmother.

Do you have any remedies like this? I would really like to know of any other old remedies for things!
Please leave me a comment telling me of any you know about.

Monday, October 25, 2010

Menu: Oct 18-24

I have a confession... in July I said I was going to post a recipe after I finished with my bread tutorial... unfortunately things got a little crazy and I forgot to post it! I realized this as I was getting this post ready because I made the stuffed bread again and was going to link to it but found I have no link since I have no post (confused yet?). So I will be posting my stuffed bread recipe on Thursday... I am still holding a poll though. Here's the deal. In the past two weeks things have been so crazy here on Thursdays that I feel rushed to get the meal post done. So to make my life easier I am going to hold a poll from the Monday when I post the menu to Saturday. Then I'll be posting that recipe the following Thursday. So the winner of this poll will be posted next week on Thursday (11/4). There are benefits and cons to this decision. (Benefit - I get more time to get the post ready, con - you don't get to see the post until a week and a half after I post the menu. Benefit - people who only stop by once or twice a week will still get to vote, etc.) I hope it results in more people voting and less stress on my part ;).

Here's our menu:

Monday: BBQ chicken tortilla pizza

Tuesday: Pineapple Fried Rice (Experiment - turned out okay but I have no photos and couldn't tell you exactly how I did it... it involved using Hoisin sauce instead of soy sauce because I forgot I was out of soy sauce until I was almost finished making this!)
Wednesday: Individual Stuffed Bread

Thursday: French Onion Soup

Friday: Bacon Mac & Cheese

Saturday: Ate out (We drove 2 hours to have dinner with some friends, then drove 2 hours back... thanks Adam & Chelsea!)

Sunday: Spaghetti & Meatballs

 Vote for the recipe you want to see next Thursday!

Friday, October 22, 2010

Stop and smell the roses

Sometimes in life we get really busy and forget to take time to do things we enjoy. This past week I have been taking some time to do things I've wanted to do. Not all 'fun' things to do, but things I needed to get done. Except spending time with my best friend...
Do you have to remind yourself to take time to smell the roses?

Thursday, October 21, 2010

Taco Soup

 Fall (and winter for that matter) are seasons that just scream for soup to be made. I think there is just something wonderful about eating a bowl of hot soup on a cool (or cold) night. I find myself making excuses to prepare delicious soups as soon as it starts to turn cool. We've had a warm autumn but I still find the need to make soup! This version of taco soup is really easy and I love how few ingredients actually go into it!


Taco Soup
 First you'll need 1 pound hamburger.
 Brown it in a pan - I used the same pan I made the soup in.
 Next you'll need a can of kidney beans (14.5 oz), a can of corn (14.5 oz) and 1 can crushed tomatoes (29 oz) and 1 can diced tomatoes (14.5 oz). I doubled it here so that's why there are extra cans.
 Add the tomatoes to the hamburger.
 Stir to combine.
 Add the beans and corn. Add taco seasoning to taste (I used 1 -1/2 times the recipe).
 Stir in pan and let simmer for 30 minutes.
 Place in a bowl.
 Add sour cream to taste (Or if you find your sour cream has mold, use whipping cream.)
 Top with cheese. We used taco blend cheese with jalapenos. Yum.
Serve with tortilla chips (these are home made - try it sometime they are delicious!)
Enjoy!

Wednesday, October 20, 2010

Kitchen Tip: Cleanliness...

So I am totally a hypocrite in saying this but having a clean kitchen is so helpful when cooking. For instance, I would not have burned myself if my counter was clean and I wouldn't have had to put the cookie sheet part way over the sink (and partway sticking over the edge...)

That said if you have a clean kitchen you'll be able to find the items you need to work with (instead of looking for 10 minutes), you will have a clean surface to work on and not have to find an alternative (like a cutting board), and it will improve your mood (at least it does mine!)

So do yourself a favor (and I'll work on it as well) and have a clean kitchen!

Tuesday, October 19, 2010

Tuesday Treats: Pudim (Flan)

A few weeks ago I wrote about a dinner party for Project Food Blog Challenge #3. For dessert we had Pudim aka Flan. As I served it my friend commented about the fact that I'd made it from scratch - she'd never attempted it before and thought it would be hard. At that moment I knew I had to post a step by step on how to make this delicious dessert because I'd had the same misconception. While it may not be as easy as no bak cookies, it is not as hard as it may seem... I think the hardest part was making the caramel for the bottom of the container! I tend to get a little ansy and do not make it as dark as it needs to be. However, when I made it for the dinner I had just learned a new trick to help me know when it was dark enough. I'll be showing that one later ;).

I made this using muffin tins... however I would not suggest doing the same. Why? First the caramel that is put on the bottom doesn't turn out as good. While there is some that turns liquid, there is a disk of sugar that is also in the bottom of each cup. However if you do want to try it in a muffin tin, double the amount of caramel sauce that you make. I do highly suggest using a ceramic or glass baking dishes to make these - such as  souffle dishes, oven safe coffee mugs, or custard cups.

Flan
Recipe adapted from Rick Bayless
Caramel:
You'll need 3/4 cup sugar.
Place it into a pan.
Next you'll need 1/3 cup water.
Drizzle it on the sugar.
The sugar and water will be separated in the pan.
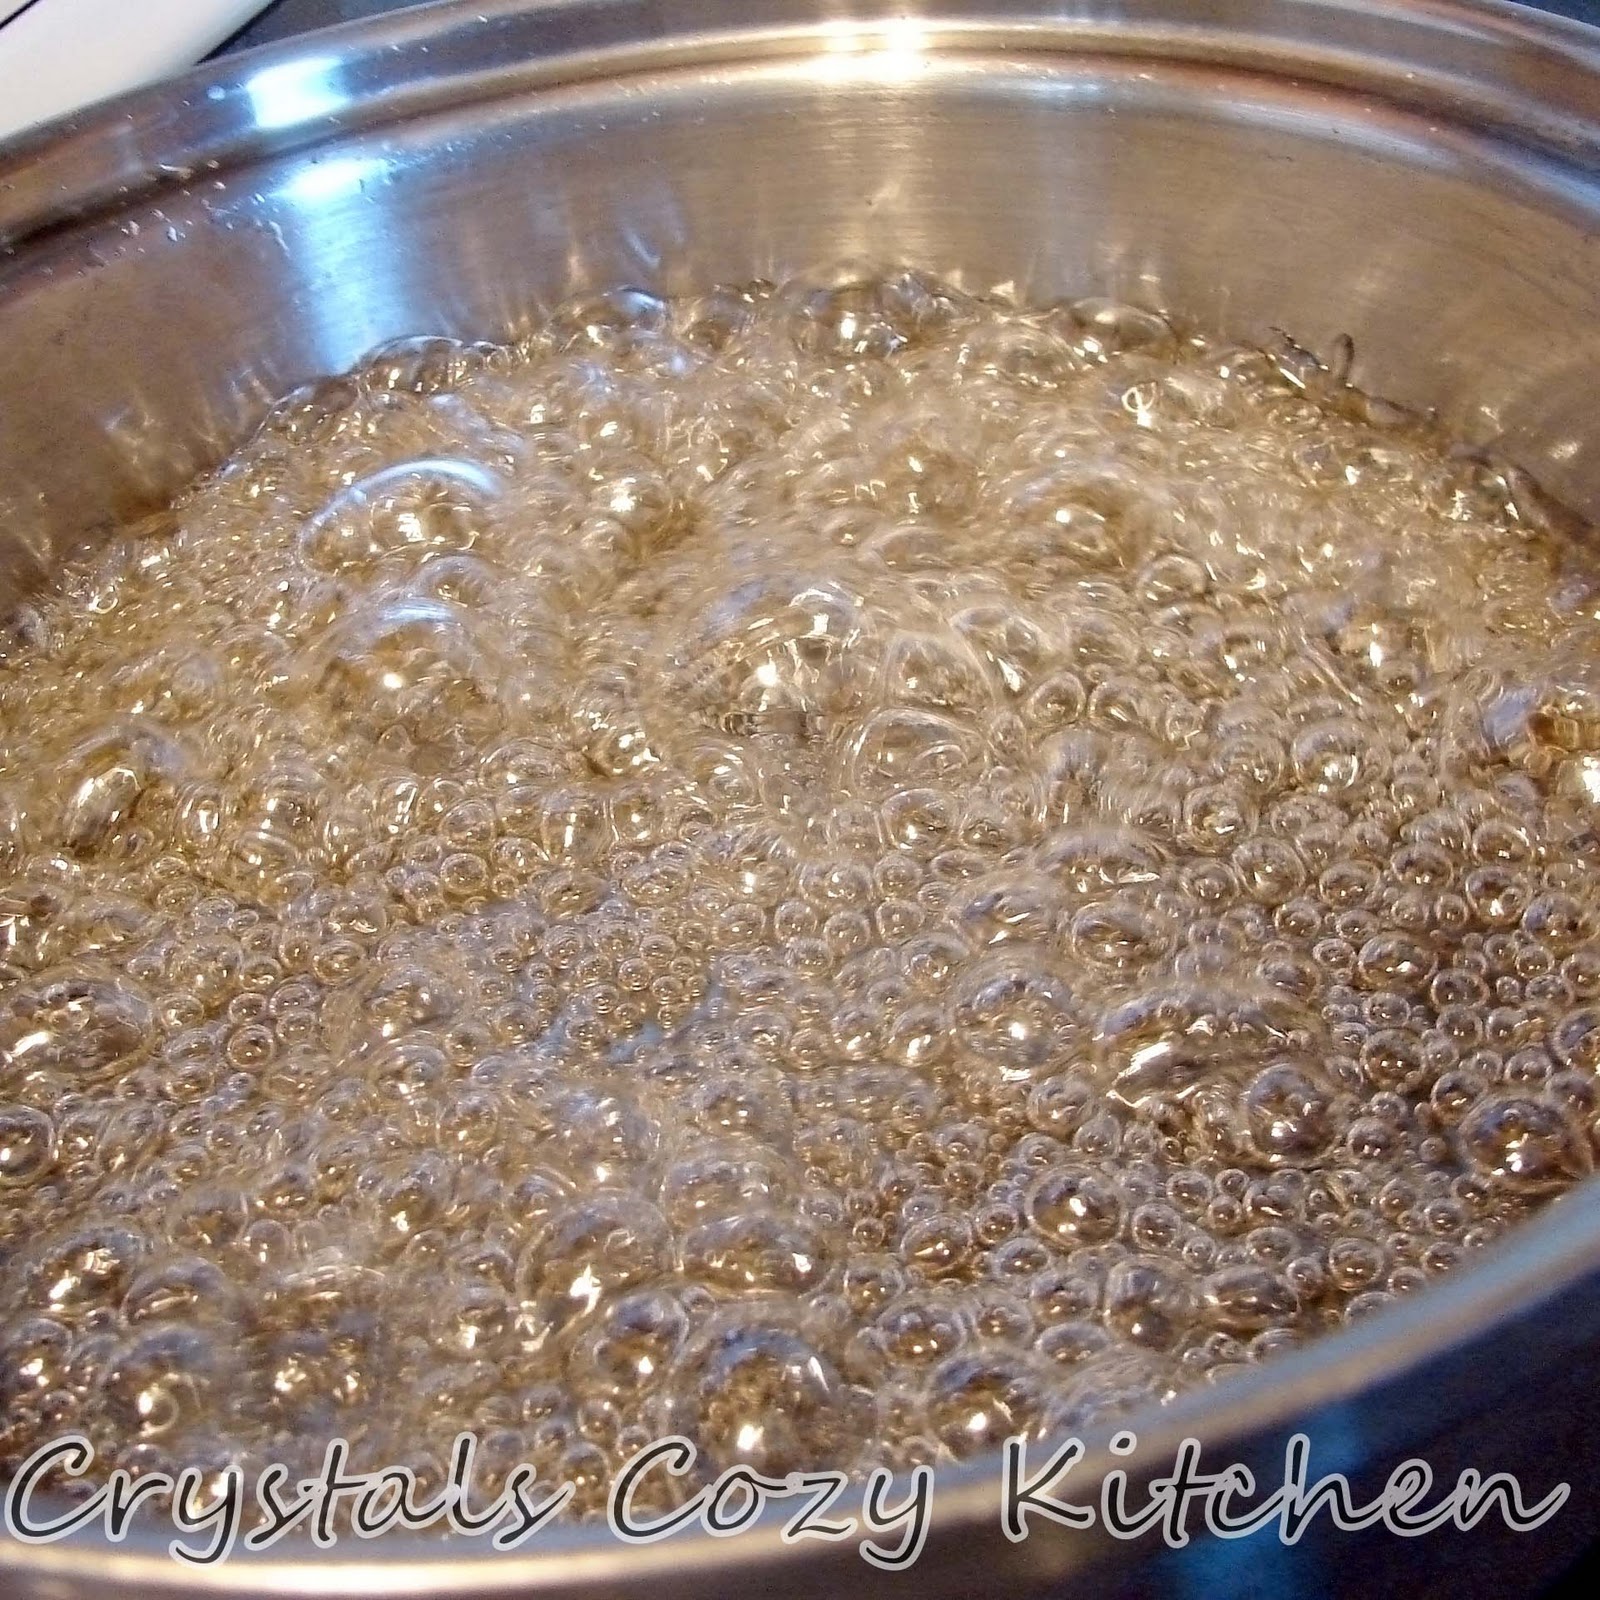
Cook over medium-high heat.
When the sugar/water comes to a full boil use a pastry brush to wash down the sides of the pan. Dip brush in water as needed.
Reduce heat to medium and boil for about 5 minutes or until golden.
Swirl the pan over heat until it reaches a deep straw color.
Remove from heat and swirl until it reaches a deep amber. (The spots are from not washing the sugar off the side of the pan like I should have...)
So the secret to getting the right color - drop a bit onto a white surface (like these paper towels.)
It is easier to see the color of the caramel this way.  The circled color is the amber color we're looking for.
Pour into cooking dishes. So the first time I made these and made it too light it was the above color, the second time they were this color:
Much better color.

Custard:
In a saucepan, add 1/8 cup sugar (I originally used 1/4 but felt it was too sweet, 1/8 cup was perfect.)
1 can sweetened condensed milk and 1-1/2 cup milk.
Stir to combine.
Add the peel of 1 lemon (or lime.)
Over medium heat bring to a simmer, stirring frequently.
Once it reaches a simmer remove from heat.
Steep for about 10 minutes.
While it is steeping bring a pot of water to a simmer. (I also used this time to make the caramel and to prep the rest of the custard mixture.)
You'll need 3 eggs.
place them in a bowl.
You'll also need 4 egg yolks.
Place the egg yolks with the whole eggs.
Then beat the eggs.
Beat them until completely mixed.
Add the milk mixture slowly while whisking the eggs.
Then add 1-1/2 tsp vanilla extract (no substitutes - if you're making flan you might as well splurge on the pure vanilla extract.)
Next you'll need to strain the lemon/lime peel out of the custard by pouring the custard mixture into a sieve over a clean bowl. (Unless you're making one large flan then you can strain it directly into the pan.)
Discard the lemon peel - unless you want to add it to something you're cooking (be sure to get it warm so the egg on it doesn't cause sickness...)
Pour flan into baking pans.
Baking pans should be in a dish - since I used muffin tins, I placed these in a jelly roll pan.
Add the simmering water to the pan. You want the water to come up to half to 2/3rds the way up the mold - so if you use a dish like on the right hand side, it would be best to put it and the water into a deeper pan.
Bake at 325 degrees for 30 minutes for muffin tins, 50 minutes for a 6-ounce dish (makes 6), 60 minutes for a 8-ounce dish (makes 4) and about 70-80 for a large dish.
Cook until they are just set in the middle (You can see in the middle row there is a finger print - guess what once you invert it no one can tell!)  Let cool for 1 hour in the hot water bath. 

Refrigerate for 1 hour in a muffin tin or at least 2 hours in any other dish.
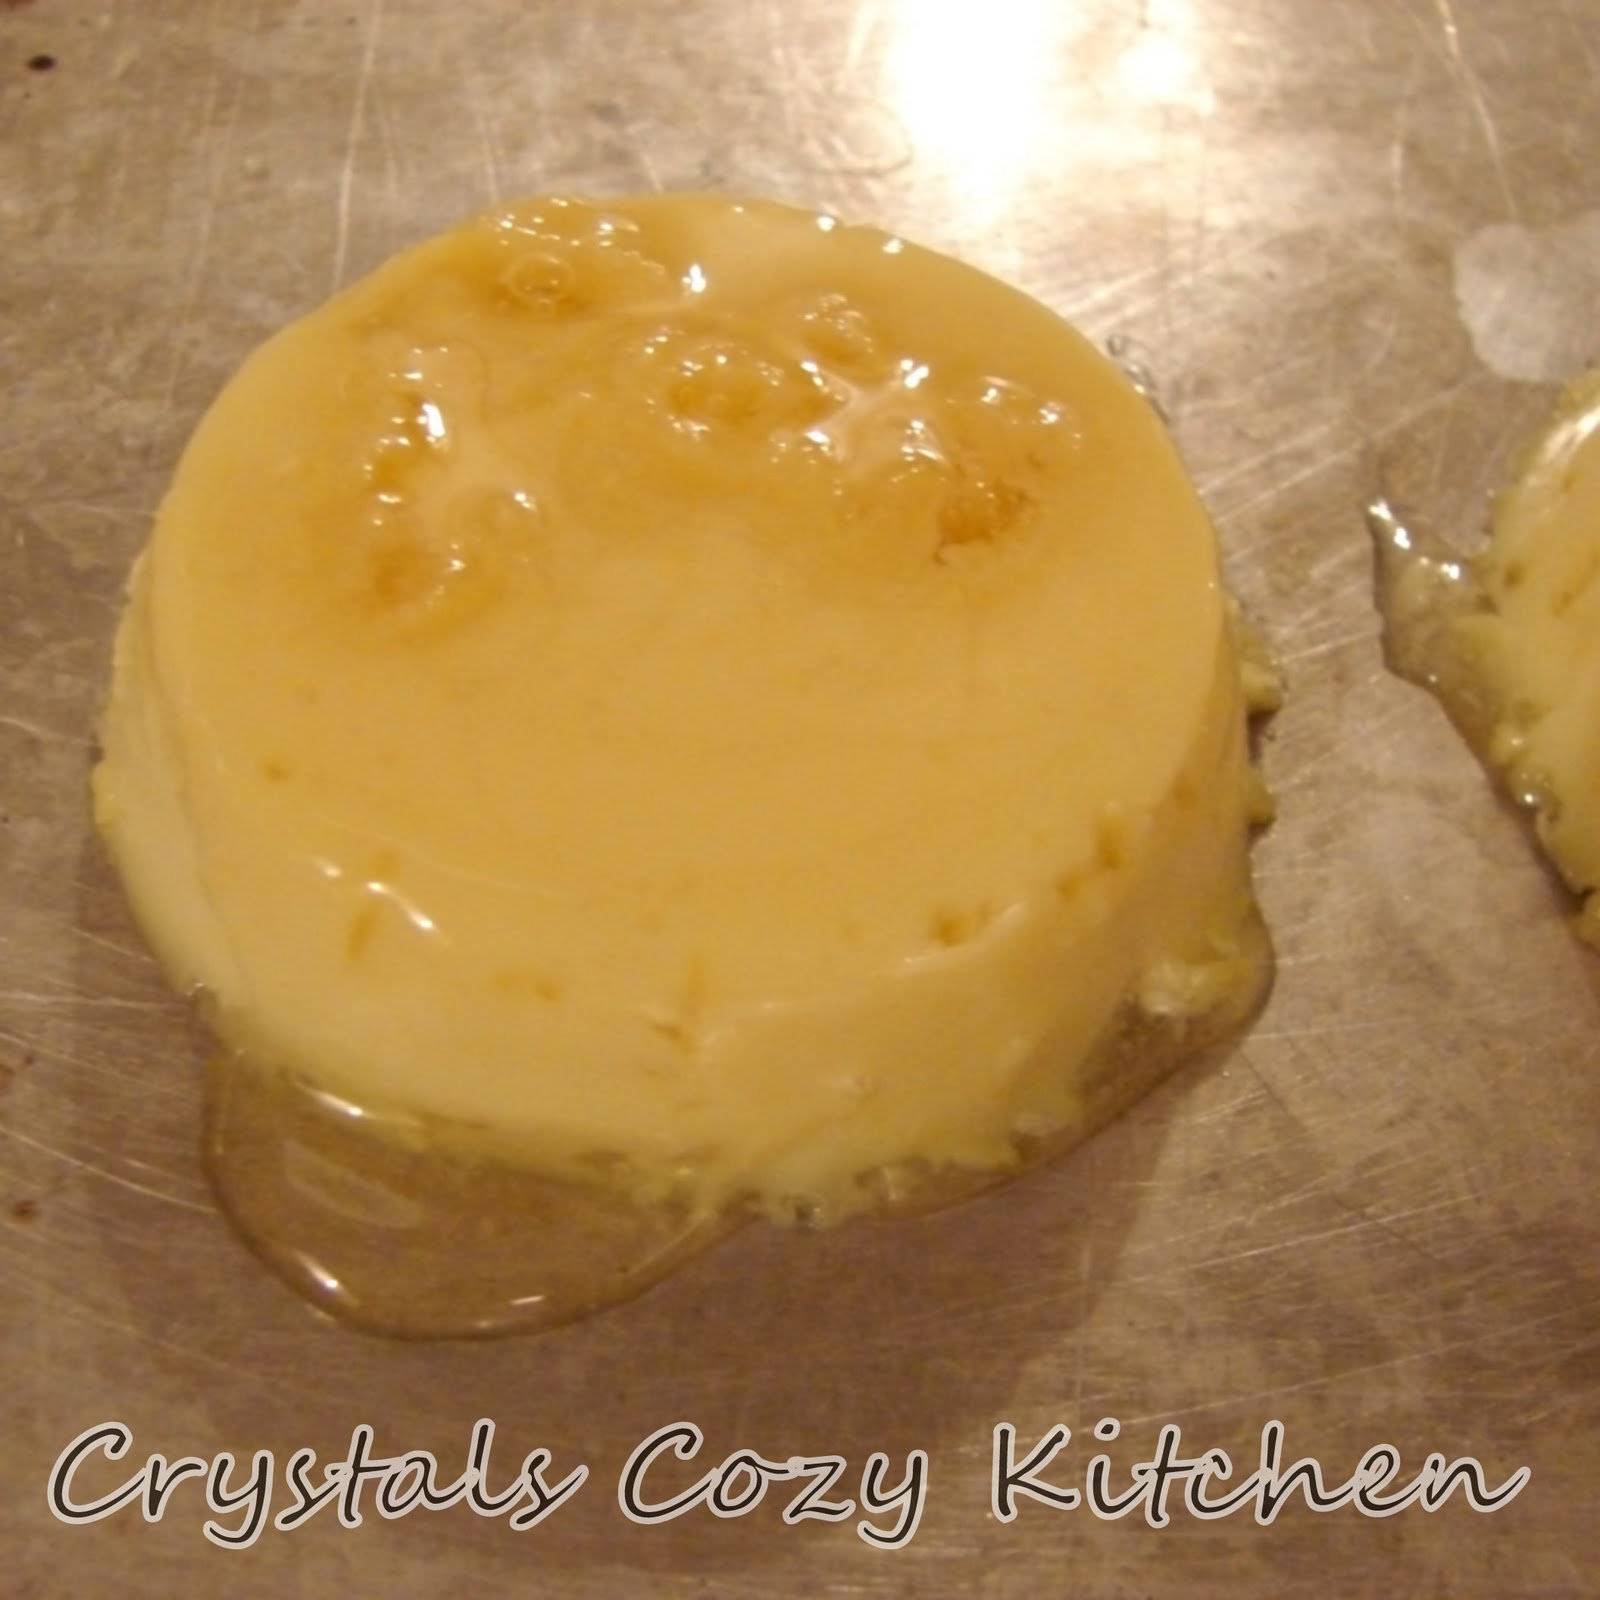
Loosen custard from sides of pan.
Some look better than others - depends on the amount of time you put into running the knife around the edge.
Invert pan onto serving dish (unless you used a muffin tin in which case, invert it over a large item like a cookie sheet.)
Place on serving dish.
These are the light caramel flan. 
 The top would be darker otherwise (as with this one above).
These are cute desserts and the perfect way to end a meal.
These are seriously so good - you should make them soon!
Enjoy!