

Friday, May 18, 2012

Salsa Verde Pork Loin Roast (Slow Cooker)

Yesterday I shared with you the recipe for Roasted Salsa Verde. Today I'm going to show you what I did with that wonderful little salsa. I am really tempted to make this again really soon, I loved the taste of this pork roast that much! I really, really, really want to use it to make quesadillas! I want to see if they taste anything close to the pork quesadillas at a place we use to eat while hubby was in grad school. If they do, watch out because that will be on the menu every month at least! It was one of my favorite things to eat... I actually used the leftover pork from this to make enchiladas - which are currently in my freezer just waiting to be cooked after baby is born. I made a few freezer meals for when my son was born 3 years ago, but this time I'm going to have a few more at the ready! I already have about a month's worth of burritos ready for my husband's lunches during that time (chicken, beef and a few pork.)

The other day while eating this pork on a salad my husband stated that it would taste good on a shingle. I can say he's not the only one in love with this delicious pork! (And no I don't suggest trying to eat it on a shingle!)

Salsa Verde Pork Loin Roast - Slow Cooker
First, you'll need a slow cooker and a pork loin roast. Mine was about 3 lbs and I had to cut it in half to fit in my slow cooker... which I do need to replace with a larger one.
Pour the Salsa Verde over the pork loin roast. If you don't want to make your own, you can buy it in a jar at the store - 16 oz bottle and dump the whole thing in there. (With my recipe I actually had some left over... about a cup or so. You can add it all or reserve it for another use.)
Make sure the loin roast is pretty much covered.
This is where I remembered I forgot to add the cilantro to the salsa, so I just tossed some sprigs into the slow cooker.
Cook on low (or high if pressed for time) for 8-10 hours (high for about 5) or until cooked through. (I only took this picture after I removed one piece of the roast - it didn't shrink down that much ;).
Next, shred the pork - removing the fatty pieces from it as you go.
Look at that delicious shredded pork!
We just ate the pork with rice (coconut rice actually.) I topped it with a bit of the juices from the slow cooker.
I highly suggest trying this out soon. I know I will be making it again really soon!
Enjoy!

Thursday, May 17, 2012

Roasted Salsa Verde

This year I have discovered a new love... It has the name of Salsa Verde. Now I've known about salsa verde for a while, but until this year I had never realized how delicious it is! I'm not talking about using it for chips and salsa, but for actually using it as the cooking marinade/sauce. Seriously I wish I would have discovered this years ago! This recipe calls for roasting all the ingredients in the salsa verde before pureeing them. I adore the taste of the roastedness of the ingredients. I've made this and frozen it before as well. I can't tell you how it is to eat it plain once it has thawed as I used mine to cook chicken in the slow cooker (and boy was that DELICIOUS!)

Roasted Salsa Verde
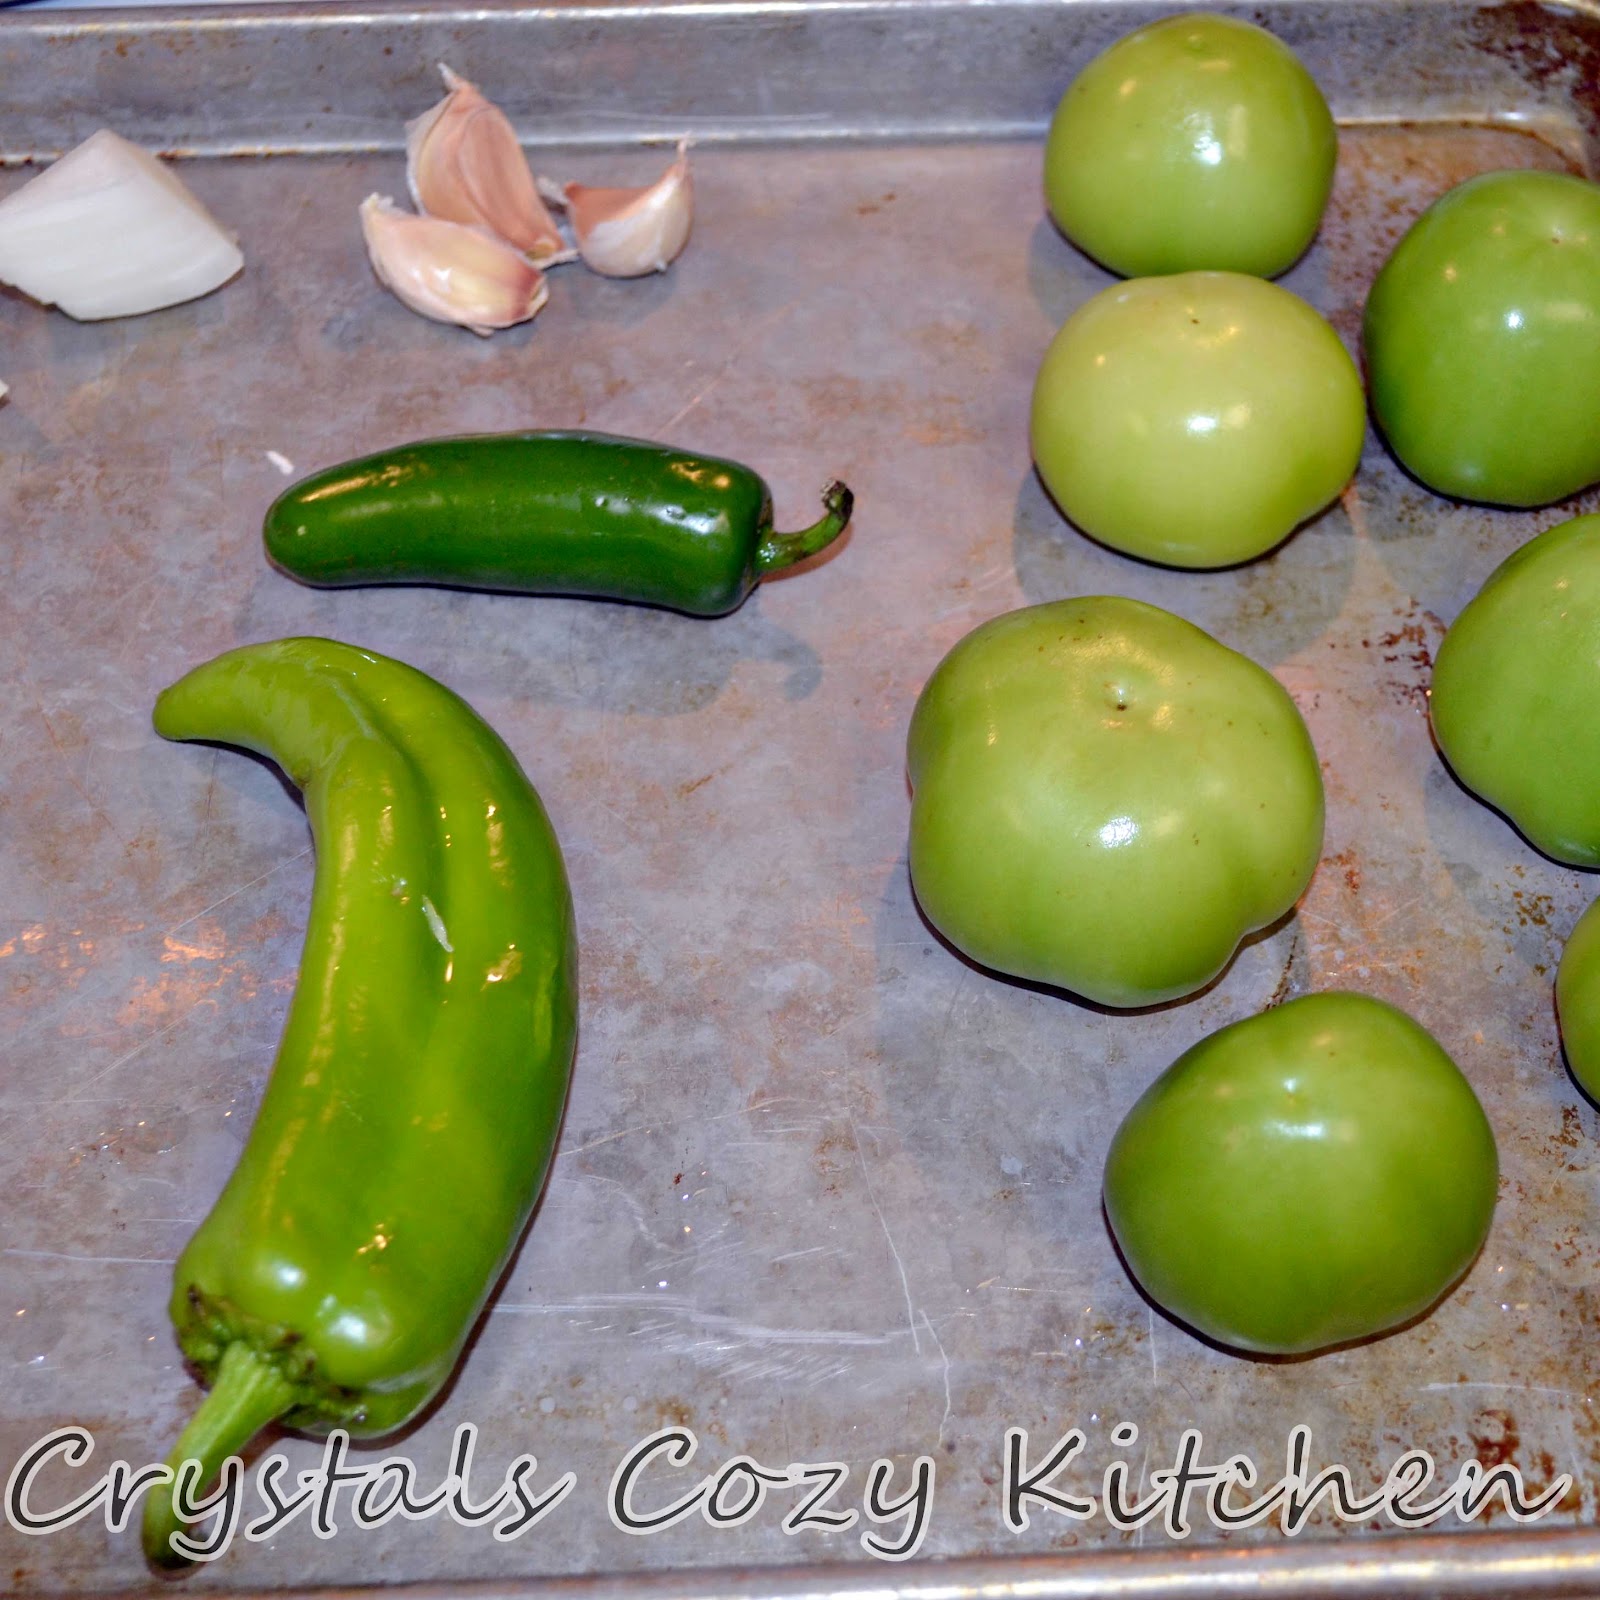
First, you'll need 1 white onion, cut into chunks, 3 cloves of garlic, 1 jalapeno and 1 anaheim pepper.
 You'll also need Tomatillos - I used 8 medium-large or about 1.5 pounds. (For those of you who don't know what they are - ) they are these green things that look sort of like tomatoes on the baking sheet here... In the stores they have a little husk around them (pictured here). I just learned about tomatillos a year or two ago... and have loved them since!
 Now, you'll want to drizzle some oil on the onion (I used olive, but any vegetable oil should work.)
 You'll also want to coat the garlic cloves (skins still on) with oil as well.
 Put them under the broiler for 5 minutes. (I typically use mine at 400-500 degrees and the pan 4-5 inches below the heat source.)
Everything should start browning.
 After 5 minutes, remove and flip the peppers and tomatillos over, then stir up the onion. Oh and don't forget to also flip the garlic over as well.
Once everything has been tossed around a bit, put it back in the oven for 5 minutes so the other side can get toasted as well. 
 Remove from oven,
Place the peppers in a kitchen towel/washcloth, etc. You can also use a freezer bag - it needs to be heavy or else it will melt.
Cover the peppers with the cloth or seal the bag and let them rest for 5 minutes.
 Put the tomatillos and onion in a blender or food processor.
 Now for these little babies. Cut the end off and then the rest is pretty simple...
 Simply squeeze the peel and the garlic should pop right out.
 Be sure to have it over something to catch it! I just did this over the baking sheet.
 Put the peeled garlic cloves in the blender/food processor as well.
 After your peppers have rested, uncover them and remove the skins.
 Simply grab at a piece that is loose and peel back.
 Repeat until all the skin has been removed.
(I won't tell if there are still a few small pieces of skin on your pepper...)
 Once the pepper is peeled, cut off the stem. If you want a mild salsa you'll want to cut the pepper open and remove the seeds.
 However, for this salsa, I left them in... I knew what I had in mind for this deliciousness and it wasn't for straight eating (in which case mild is what I typically go for!)
 Toss the jalapeno into the blender/food processor.
 Repeat the peeling and removing of the stem with the anaheim pepper as well.
 Once all the ingredients are in the processor, simply blend it up completely! You can also add 1/3 cup of cilantro as well. Add salt to taste.
 Now you're ready to use this deliciousness! I'll shortly be sharing with you what I used mine for!

Enjoy!

Monday, May 14, 2012

Menu: May 7-13

I hope all of you had a wonderful mother's day and were able to remember how wonderful (hopefully) your mother is! I also hope that those of you who are mothers were able to have a wonderful day... We were all feeling a bit under the weather so it wasn't the perfect day it could have been (has anybody really ever had the perfect mother's day? If so please feel free to leave a comment telling me how, because for me they tend be the day that things don't happen like they should and it is better at reminding me everything being a mom entails!)

Something else I realized - I shouldn't bottle and process 6 jars of jam and 3 jars as well as 4 freezer jars of syrup the day before Mother's day... at least not if I want a clean kitchen on that day (especially not if my husband isn't feeling very well! He did do dishes twice on Saturday but there is still stuff to be cleaned up... and so far today I've done pretty good at ignoring it!) However, I am excited to have strawberry jam and syrup! On that note, have I mentioned that this year is the first time I've ever canned anything (well besides helping when I was younger.) The first thing I every canned all by myself was spaghetti sauce... then I made strawberry jam. I have to say that if you're planning on canning for the first time - jam is SO MUCH EASIER than spaghetti sauce. I highly recommend starting with something simpler than spaghetti sauce - even just canning whole tomatoes would be better! The spaghetti sauce took the whole day. Whereas the jam only takes 1-2 hours. Just a hint for those of you who like me have never canned and decide to try it. 

I should really get off my tangents and talk about our menu...  This week we had: 
Grilled Chicken, veggies and twice baked potatoes

Chili Rellenos

Ate out (this was the day I had my glucose screening test and was really tired on top of it!)

Tropical Chicken with Coconut Rice

What did you have to eat last week?

Thursday, May 10, 2012

Parmesan Crusted Chicken

So I have to apologize... I recently discovered that I was going to post this around the time I got morning sickness and totally spaced it! So 5 or 6 months later I'm finally getting to it... It is times like this when I decided I need to be more organized when it comes to what post and when... however at the time I did not know that editing photos and posting recipes would make me feel really ill. Seriously I did not even read my favorite food blogs when I had morning sickness! It honestly made me more nauseous than I already was, and I didn't need anything to make me feel worse. Luckily at about 14 or 15 weeks the morning sickness left and I felt so much better... In fact as I looked back on the months prior it felt like I had been living in a fog and had come out. It was so strange and yet I was so grateful to NOT be there anymore! I will have to say that it helped me to understand people who say they were so sick and were living in a fog - I know people have much worse sicknesses than morning sickness who say that and I'm not trying to make light of it. I'm just saying that I have a bit more understanding and empathy for them now. 

Where was I? Oh yeah Chicken... I am really good at going off on tangents and forgetting where I was. Pregnancy brain is real and I think it is worse this time than it was last time! I honestly feel like the part of my brain that remembers things is partly missing... I wish it would come back, and soon! Anywho, I should start posting the recipe before I start wandering again.

Parmesan Crusted Chicken
First you'll need Panko - Japanese Bread Crumbs. Can I just say how much I love this ingredient?! I discovered it just a few years ago and was hesitant at first, but now I absolutely adore it. It gives a wonderful crispness to the food.
You'll want about 1-1/2 cups - it doesn't have be precise...
Next, you'll need some flat leaf (or Italian) parsley.
Chopped up of course.
Next, you'll want 1/4-1/3 cup parmesan. I typically use the canned stuff in this recipe, except I'd ran out (I don't use a lot of it so it is one of those ingredients that I don't worry about checking to see how much I have - do you have any ingredients that you typically only know you need more when you want to use it?) so I used some fresh grated as well.
Toss the parsley and parmesan in with the panko. This is Parsley Parmesan Panko - what a nice alliteration... and totally not planned when I put this recipe together ;).
Mix them together. Set aside.
Next, you'll need 2 eggs. If you want to make it a bit healthier, you can just use egg whites. Beat them together and place in a shallow pan. Set aside as well.
You'll also need 1 cup flour.
Place on a plate or in a shallow pan as well.
Add 1 tsp salt.
to the flour,
and 1/2 tsp pepper - I used white pepper, but you can use black if you prefer.
Dump it onto the flour.
Mix to combine.
Coat your chicken breast in flour. I actually cut my chicken breasts in half before I did this... I'm trying to not use a whole breast per person (saves money and is closer to an actual serving size!)
Be sure to get both sides coated.
Then dip in the egg mixture.
You're hands may get a bit messy - unless you use kitchen tongs for this... I never have, but may try it eventually!
Once it is coated in egg, place in the Panko mixture.
Being sure to coat it on each side.
I like to use my hand to press it down so it gets a fuller coat.
Place on pan and repeat with remaining chicken. I made 6 half-breasts (3 whole cut in half...) Planned leftovers - I like them. ;)
Bake in a 400 degree oven for 20-25 minutes, flipping halfway through.
Remove from oven and serve warm.
Enjoy!