It was not until about a year ago I learned the best way to cut an onion. Unless I want onion rings, this is now my go to way of cutting onions. It works like a charm! I'll talk about slicing first and then chopping.
First we start with a whole onion.
Then take the knife and wedge it into the middle of the root end. Cut down the center.
Cut down the center.
Next take off the outer layers of the onion.
Discard these layers.
Cut off the tip of the onion.
Leave the root end alone. This binds the onion together so it does not fall apart while cutting.
Slicing
Using the knuckle of your middle finger as a guide slice the onion.
You can slice as thick or thin as you like. These bad boys are going into fajitas. Yum.
If you cry while chopping onions, I've heard a few different solutions. The one that works for me most consistently is to place a tortilla chip in your mouth while cutting it. It is a little awkward, but it works pretty well.
When you're finished slicing one half, move on to the next. Or if you're like me and only need one half, I place the other half in the fridge for use - you will need to use it within a day or two because it dries out very quickly.
Dicing
If you want to chop the onion, start with the onion cut lengthwise as above,
make lengthwise cuts leaving about 1/4 inch away from the root.
Space these cuts according to how fine of a dice you want.
Continue across the onion.
I do tend to slant the knife as I cut down the side of the onion.
Your onion should look like this more or less. Like anything the more you try this method the better it will turn out - I had falling apart onions the first few times I tried it, so don't feel bad if it happens to you!
So please ignore how I am holding the onion in these next photos - it is not the best way, but it works for me because I make these cuts very carefully.
To continue the chopping, cut parallel to the cutting surface.
Cut until you get to about 1/4 inch from the root end.
And yes in case you are wondering that knife is almost touching my pinky, no I did not cut my pinky.
Next make another cut parallel to the cutting surface.
This cut may be higher than where the root holds the onion together so you may not cut it as far back as you did the first cut.
Once cut remove knife. (You did not really need me to tell you that, I promise!)
Using your hand to hold the outsides of the onion closer and the knuckle on your middle finger to guide the knife, chop the onion.
This is proper knifing technique... You make sure that all of your fingers are curled back and that the blade of the knife only touches your knuckle.
It works great and you don't have to worry about chopping off your finger. Or slicing it open.
Continue cutting until you reach the end of the sectional cuts in the onion. You can either carefully chop the rest of the onion or keep it to use in a vegetable broth.
Pages
▼
Wednesday, June 30, 2010
Tuesday, June 29, 2010
Tuesday Treats: Fruit & Cream Wafers
The other day I was in the store and ran into someone I knew who was looking for an easy treat. They had a budget of $6 and there were several people with diabetes who were going to be eating this treat. So after brainstorming, I came up with Strawberries & Cream Wafers. This treat turned out to be so delicious - I knew I had to share it with you all. Simple and delicious, what is better - it is somewhat healthy! It has fresh fruit.
Fruit & Cream Wafers
1 box Vanilla Wafers (I used the store brand as it has less sugar and was half as expensive as the brand name.)
Whipped Cream (you can use the canned stuff if you would rather.)
Strawberries, hulled and cut into fourths
Chocolate chips or shredded chocolate
To assemble: Place individual cookies on a platter, top with about 1 Tbsp whipped cream, one strawberry and a chocolate chip or shredded chocolate. Enjoy!
You can also make this a Fourth of July treat by using Strawberries and Blueberries.
Delicious!
Monday, June 28, 2010
Menu: June 21-27
We had an interesting week this week. I had high hopes for making a great menu this week, but I ended up not feeling very well on a couple of days (you can tell the days when I felt the worst by Frozen Pizza showing up on the menu. I try not to use it that often, although it has been making it on the menu a little too often lately - probably has something to do with the fact they were on sale recently.)
My goal today is to clean out our fridge and find what I need to use and plan my menu accordingly for next week. (I also just need to clean out our fridge, some of my son's whole milk got spilled into one of the crisper drawers the other day. Yuck.) Wait until next week to see what I end up making!
Here's last week's menu:
Monday: Enchiladas - made with corn tortillas - Step by Step Photos
Wednesday: Frozen Pizza
Thursday: Omelets (No picture - we had a garden veggie omelet - chopped spinach in the eggs, bell pepper, onion, parsley and cilantro inside with cheddar cheese.)
Friday: Ate out
Saturday: Mediterranean Frittata (Final Photo Only) and Banana Muffins (one of the first recipes I posted)
Sunday: Frozen Pizza
Vote for which recipe you want to see on Thursday!
My goal today is to clean out our fridge and find what I need to use and plan my menu accordingly for next week. (I also just need to clean out our fridge, some of my son's whole milk got spilled into one of the crisper drawers the other day. Yuck.) Wait until next week to see what I end up making!
Here's last week's menu:
Monday: Enchiladas - made with corn tortillas - Step by Step Photos
Tuesday: Enchiladas (same recipe was Monday only made with whole wheat tortillas)
Wednesday: Frozen Pizza
Thursday: Omelets (No picture - we had a garden veggie omelet - chopped spinach in the eggs, bell pepper, onion, parsley and cilantro inside with cheddar cheese.)
Friday: Ate out
Saturday: Mediterranean Frittata (Final Photo Only) and Banana Muffins (one of the first recipes I posted)
Sunday: Frozen Pizza
Vote for which recipe you want to see on Thursday!
Friday, June 25, 2010
Foodless Friday: What we did last Friday...
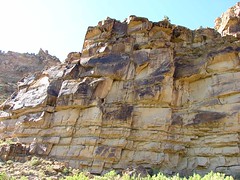
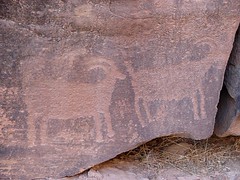
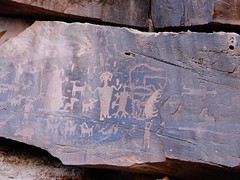
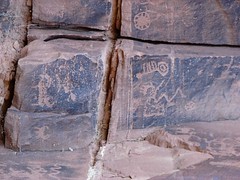
Exactly one week ago Hubby and I (and our cute little boy) went on about a 2 hour drive to get to 9 Mile Canyon. This canyon has historical significance - it has petroglyphs and other remains of the Fremont Indians. This was another reenactment of a date that my husband and I went on while we were dating. I had asked him to go on a picnic with me on June 18, 2005. There were a few differences - 5 years ago I made a Brazilian themed meal, this time we had Kabobs. 5 years ago we ate first and then looked at the petroglyphs, this time we looked first and then ate. Turned out to be a bad idea because by the time we got to the picnic area it was almost dark! The major difference - 5 years ago we did not have a 15 month old son! I don't think he was too excited about all the driving and getting in and out of the car. (To see all of these pictures and a few more: click here.)
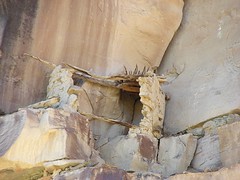
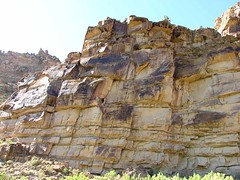
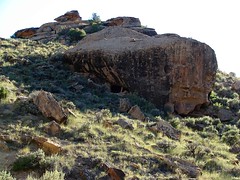
The first stop we made was to find a grainery. It is located in the photo above - can you find it. The photo below is what it looks like. This grainery has some issues - the front is missing, but we're actually grateful that it is so we can see inside!
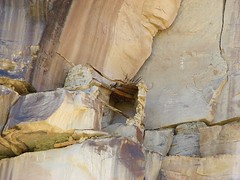
Here is another view of it:
This view shows the wood top that the grainery has. I find it really fascinating - what I find more fascinating... How did they get to these? For those of you who couldn't find the grainery in the first picture I have it circled below:
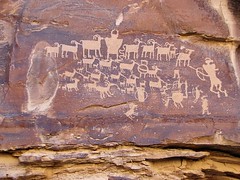
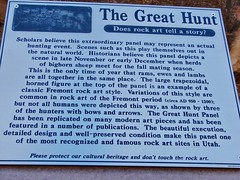
The next stop we made was at a very popular petroglyph panel called the Great Hunt. This one has been featured in National Geographic.
and the description:
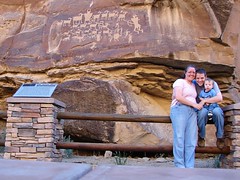
And the needed family photo taken with the timer function on the camera so we can look at them later and laugh at how silly we looked...
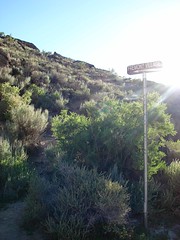
Moving on, we stopped at a trail head:
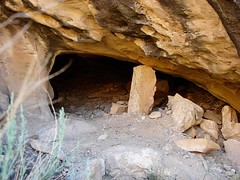
This is a sign pointing to trail for Fremont Village - the trail goes to the right - there are a few other trails that lead in different directions, but they are not the real and die off about half way up the hill... I only know this because we seemed to take all the wrong trails first. By the time we found the right trail I was exhausted and only made it to this rock:
Which had been dug out underneath and was probably a storage area.
It was quite a hike to get to this point even without having made a few wrong turns... I decided for my health (I felt I was getting heat exhaustion) that I needed to get back to my water supply. Yeah, I know silly me for not bringing it on the trail, but I honestly did not think it would be as long as it was!
Here is another grainery that we found along the road. This one has the front intact so you can see what they looked like.
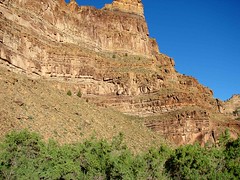
The grainery is found in this picture... this is what we had to go through to find it - and I will not have a photo with it circled this time. Good Luck. All I can say is those two trees at the cliff base - go from about their location to the right.
Now here are a few more of the petroglyphs we saw:
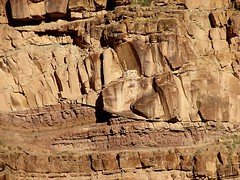
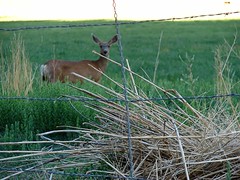
Traveling along the road we also saw:
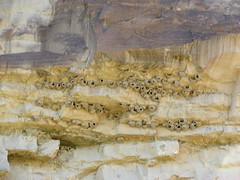
this deer and I saw a bird that we did not get a picture of, unfortunately. We also saw cliff swallows and their nests. We had them really close to my house so I forget how awesome they are for others to see - like my husband.
It was a LONG trip and I did get a killer headache - which confirmed that I was probably going to get heat exhaustion if I would have continued on past the rock with the holes in it. It was a fun excursion. Maybe in 5 years I'll forget how long we drove on unpaved roads and be temped to try it again... Maybe not.
For those of you who want a little history lesson:
Nine Mile canyon is actually 40 miles long... there are several stories about how it got the name. One is that a creek named Nine Mile Creek by mapmaker Bishop who went on an expedition with John Wesley Powell in 1869.
There are actually two types of rock art: pictographs and petroglyphs. Pictographs are painted on rocks using colors naturally found in minerals. Petroglyphs are cut into the rock. The rock art in Nine-Mile Canyon depicts both humans and animals. The Fremont had their own art style. Their human figures are horned, trapezoidal-shaped bodies. Often they have elaborations such as necklaces, earrings, shields, swords, loincloths, and headdresses. They also develo9ped a stylized way of making animals. Other designs may have been purely decorative or they may represent calendars or maps.
The Fremont:
They occupied the canyon as early as 300-500 A.D. They were a primitive people and did not shape rocks for tools or for building as the Anasazi or the Pueblo Indians did. Also the Fremont used weapons and shields that are not found in the Anasazi culture indicating that the Fremont may have migrated from a different area of the country.
The Fremont built their living quarters above the flood plain of the river. They were part Farmer and part hunter. They raised corn, beans, and squash. Some of their crops they dried and stored in granaries built in the rocks. They hunted all types of game from deer and mountain sheep to rabbits and rodents. Petroglyphs of such animals can be seen often in Nine-Mile Canyon. They supplemented their diet with seeds, nuts and roots.
They had permanent dwelling in semi-subterranean pit houses. The houses were built of wood and mud and were entered through an opening in the roof. Some of the structures still standing were dry laid (build without mortar.)
They wore very little clothing in the summer and relied on robes and blankets in the colder weather. They had distinctive moccasins made of hide and dew-claw hobnails. The hobnails were on the heels of the moccasins to keep them from sliding. (having hiked up to the area of a village I can understand the need for this - especially in the winter!) They made a simple smooth pottery with little decoration. Baskets were far more common.
Info taken from 9 Mile Canyon - A Guide. Utah's Castle Country


